Configuration Panel
This panel lets you configure the hardware that composes your robot.
- First, we need to configure at least one board that is connected to the backend machine.
- Then, we need to configure the devices that compose your robot - connected to the configured boards
- Finally, we can define logical groups to make easier use of our hardware.
Prerequisites
In this page, we will use terms like backend, hardware, boards, devices and associated vocabularies. If you don't know what this means in the context of this application, read more about the concepts behind Hermes-Studio.
- You need at least one board connected to your backend via one of the supported methods (currently Serial port). Those boards are referred to as "the robot".
- All connected boards MUST be configured with StandardFirmataPlus.ino Arduino sketch installed.
This code is available by default in Arduino IDE under the Firmata samples sketch menu.
Uploading the sketch to the board needs to be done once only.
EXAMPLE
For the purpose of example, we will consider the following (very simple) setup: 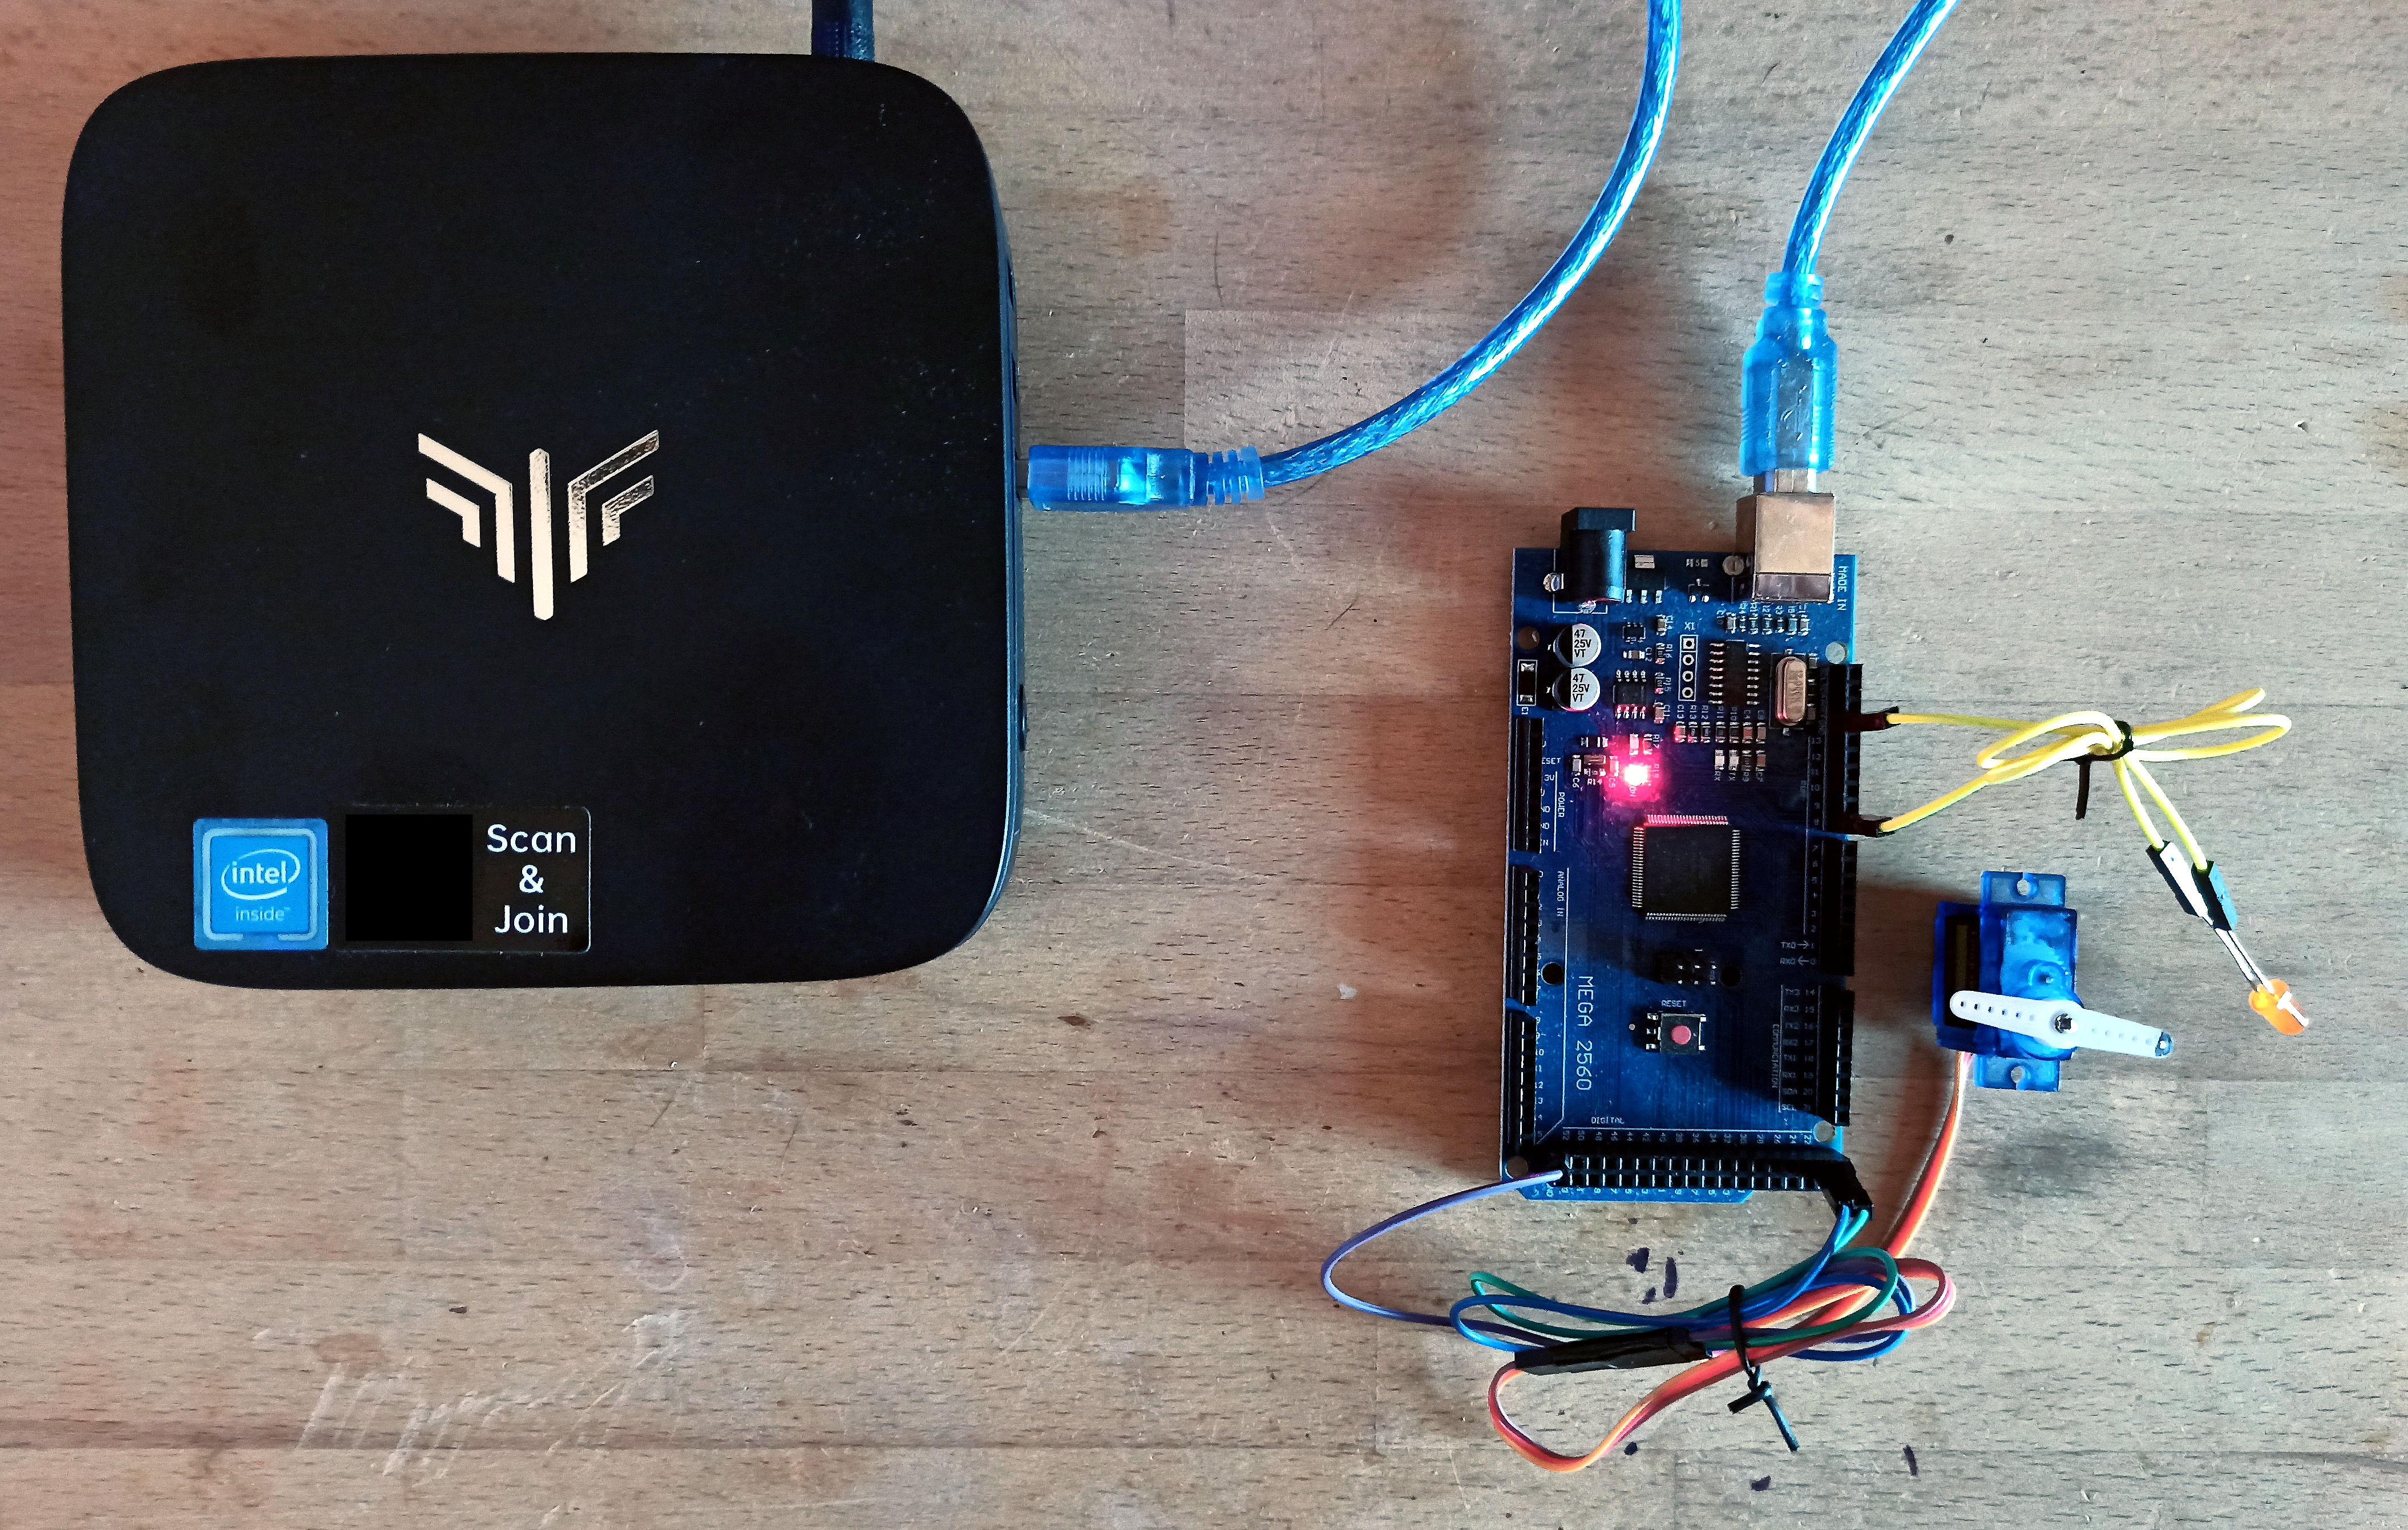
- A computer (Ubuntu 22.04) running the Hermes-Studio application.
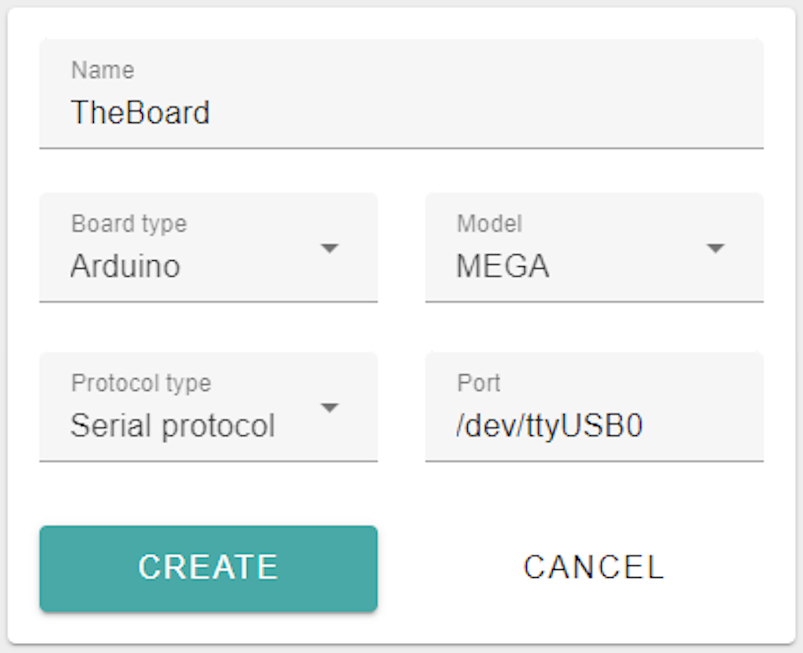
- An Arduino MEGA is connected to it by a serial USB cable on port
/dev/ttyUSB0 - The board has an embedded red led on pin 13
- An orange LED is connected to pin 8
- A basic servo is connected to pin 22
Configure board(s)
Click on the
icon to access the Configuration Panel.
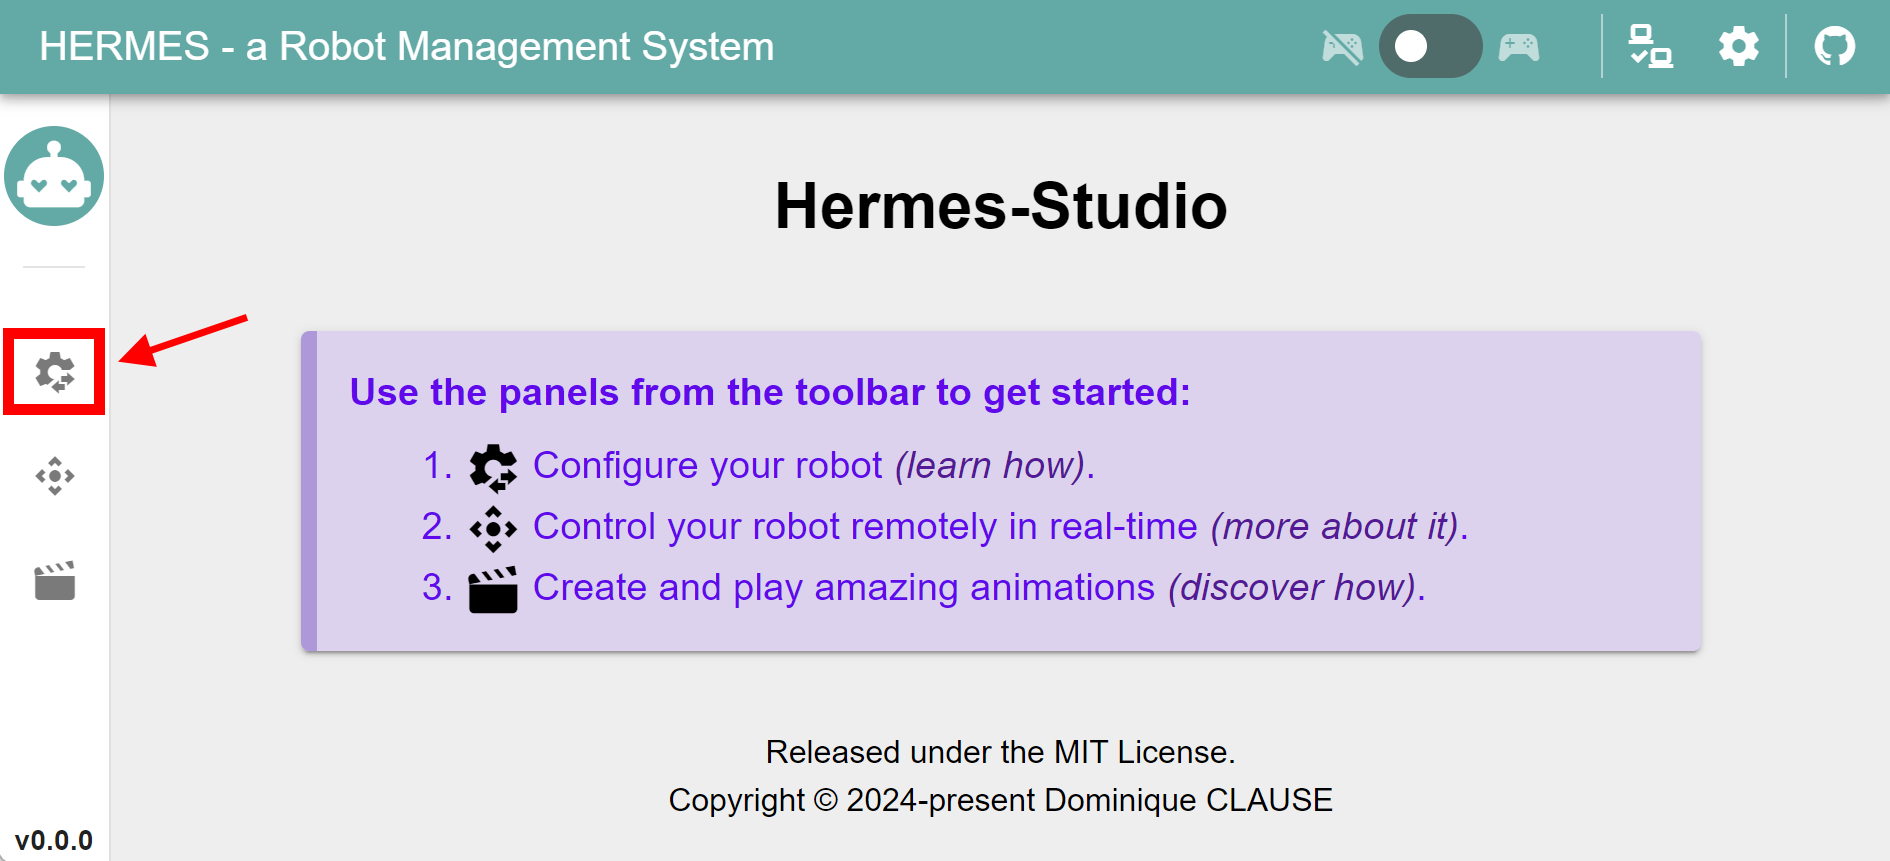
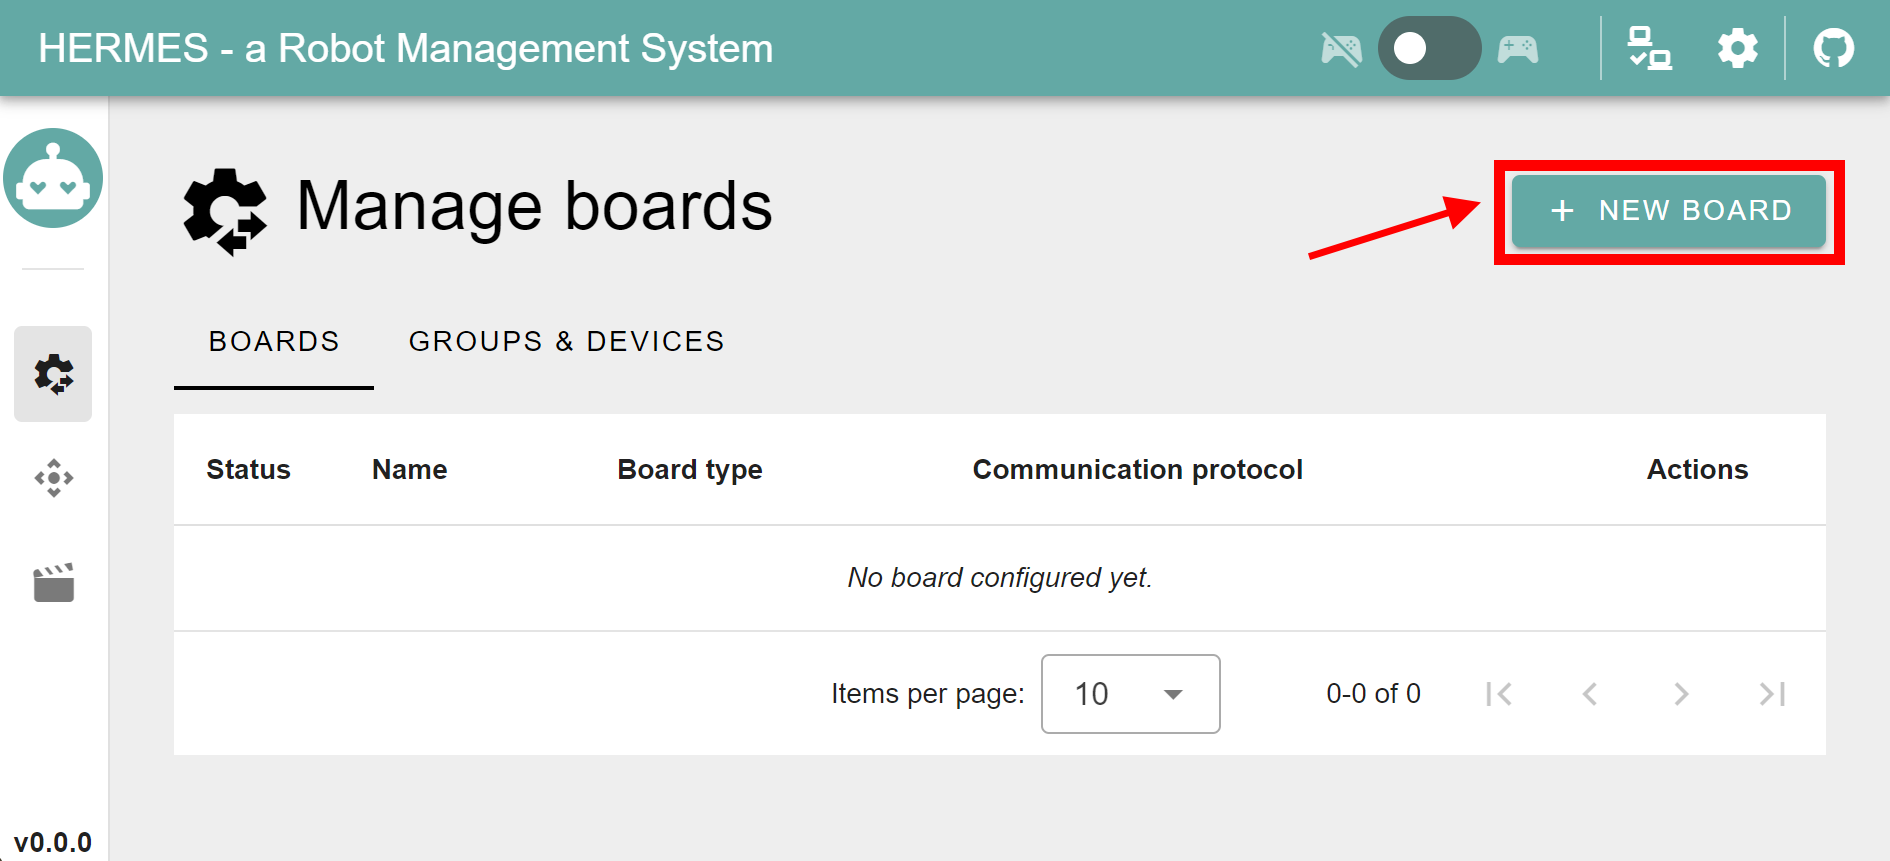
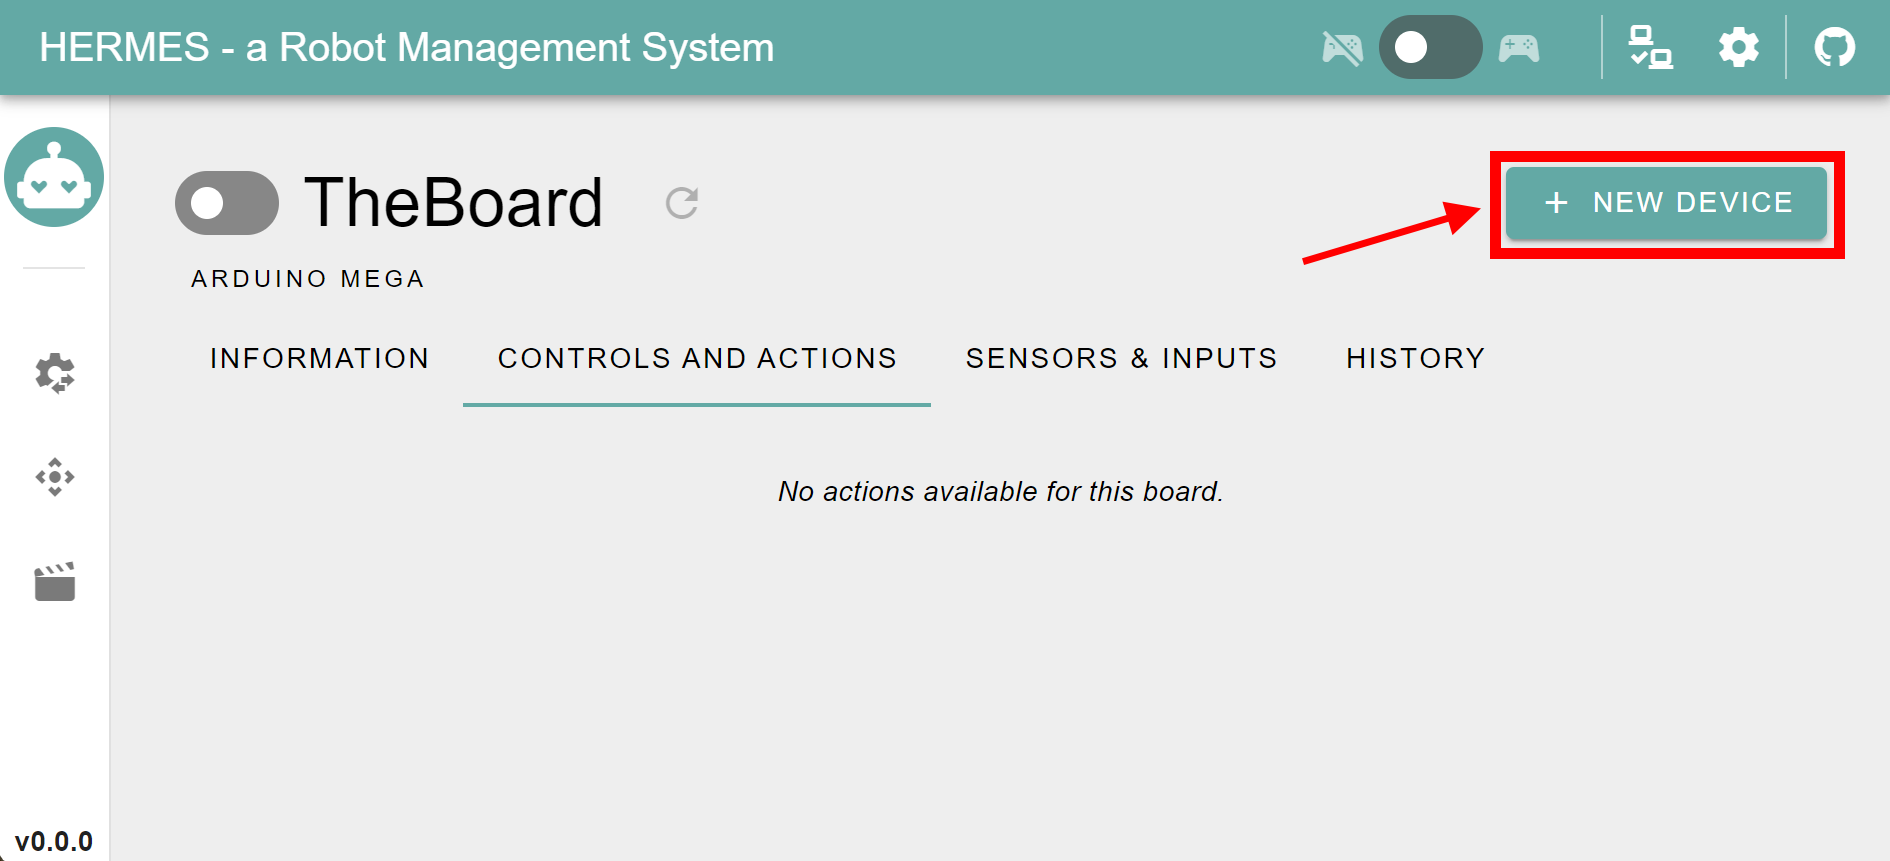
Click on the New Board button.
Configure the board according to your need.
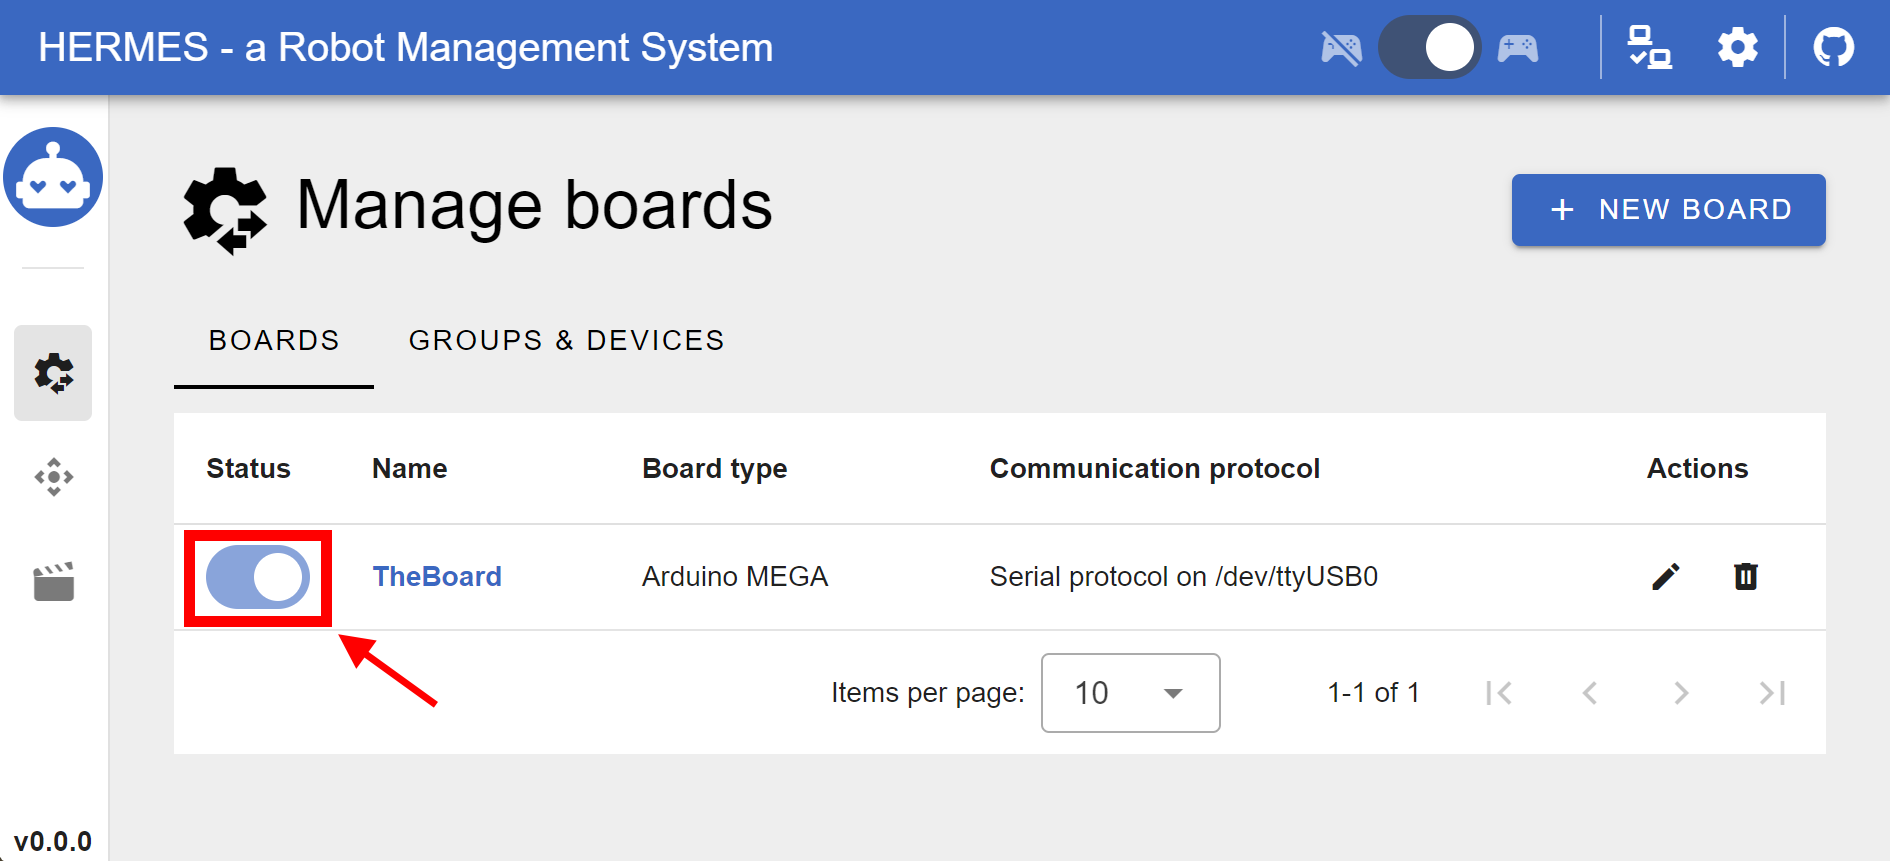
The configured board must now be connected to the backend to be used. To do so, toggle the Status button.
DANGER
Don't forget that your board MUST have StandardFirmataPlus installed
WARNING
The connection may need to be retried. We are working on this.
TIP
Notice how the color of the whole interface changes:
- cyan blue: when no boards are yet connected
- orange: when some of the configured boards are connected
- deep blue: when all configured boards are properly connected
Configure device(s)
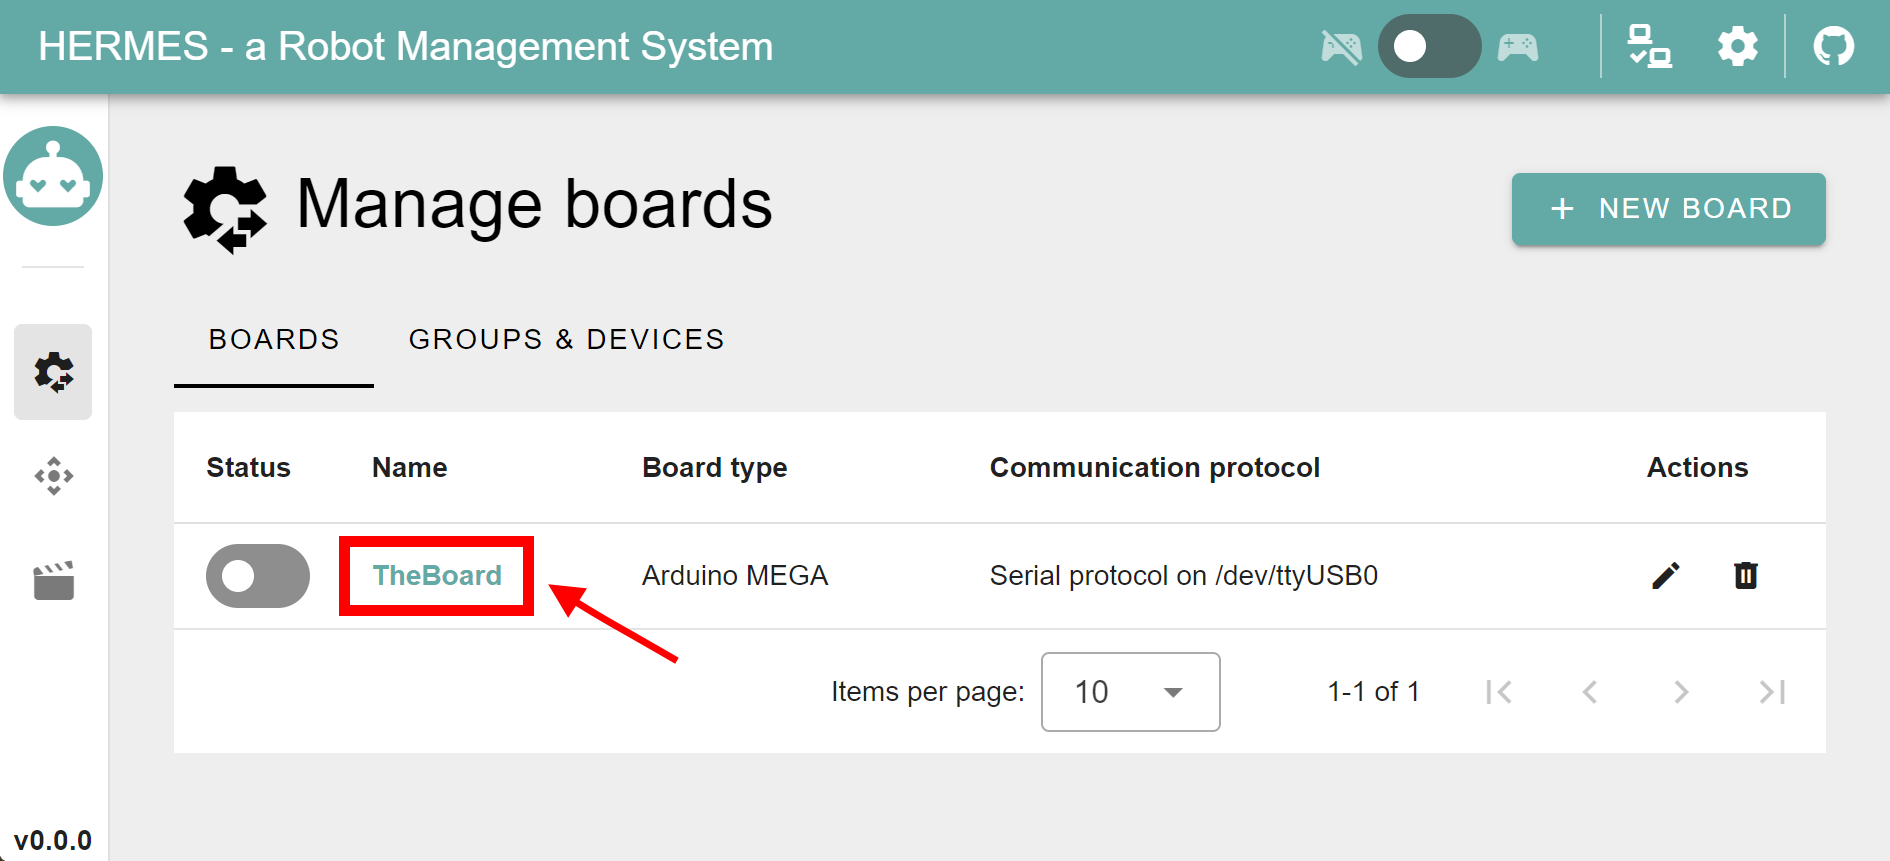
Click on the board to which the device is connected to.
Click on the New device button.
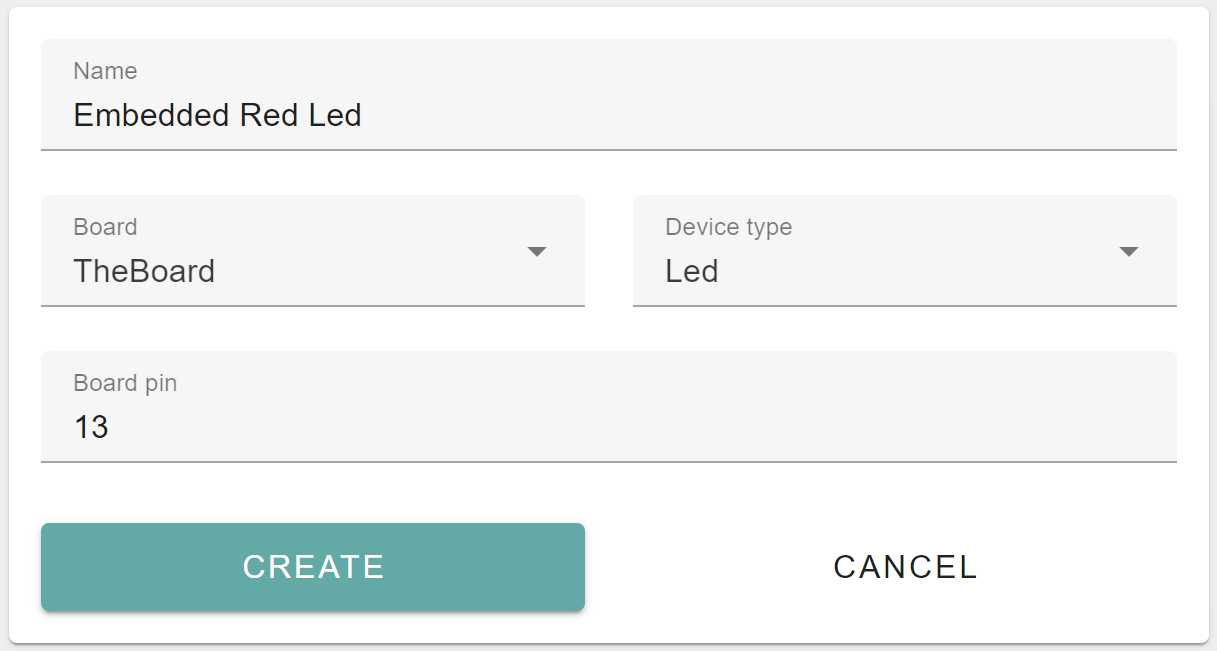
Configure the device according to your needs. See the list of supported devices for individual documentation.
EXAMPLE
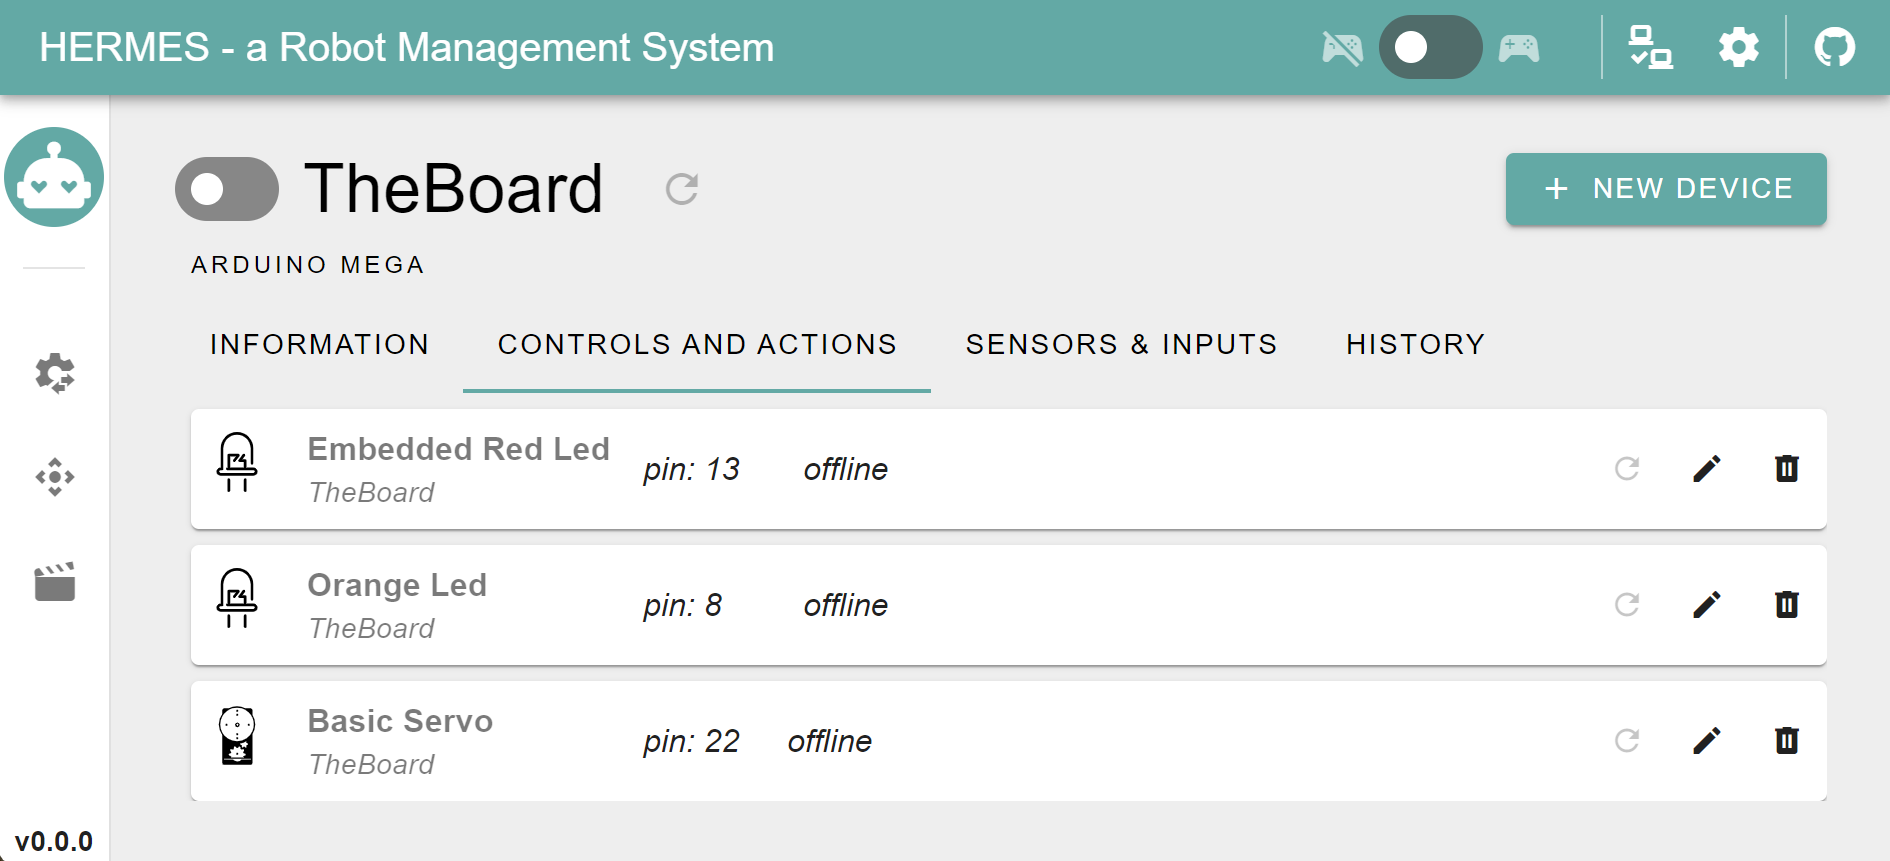
Try yourself to configure the devices according to our example:
- Embedded Red Led on pin 13
- Orange Led on pin 8
- Basic Servo on pin 22
TIP
Notice how all devices are marked "offline" in the screenshots ?
Try to connect the board and see what happens now: you can remote control the devices.
Configure Group(s)
Let's get back to the board list via the Configuration Panel icon:
You have possibility to:
- create arbitrary number logical groups
- assign devices to groups regardless of which board it belongs
- nest the groups and devices arbitrarily.
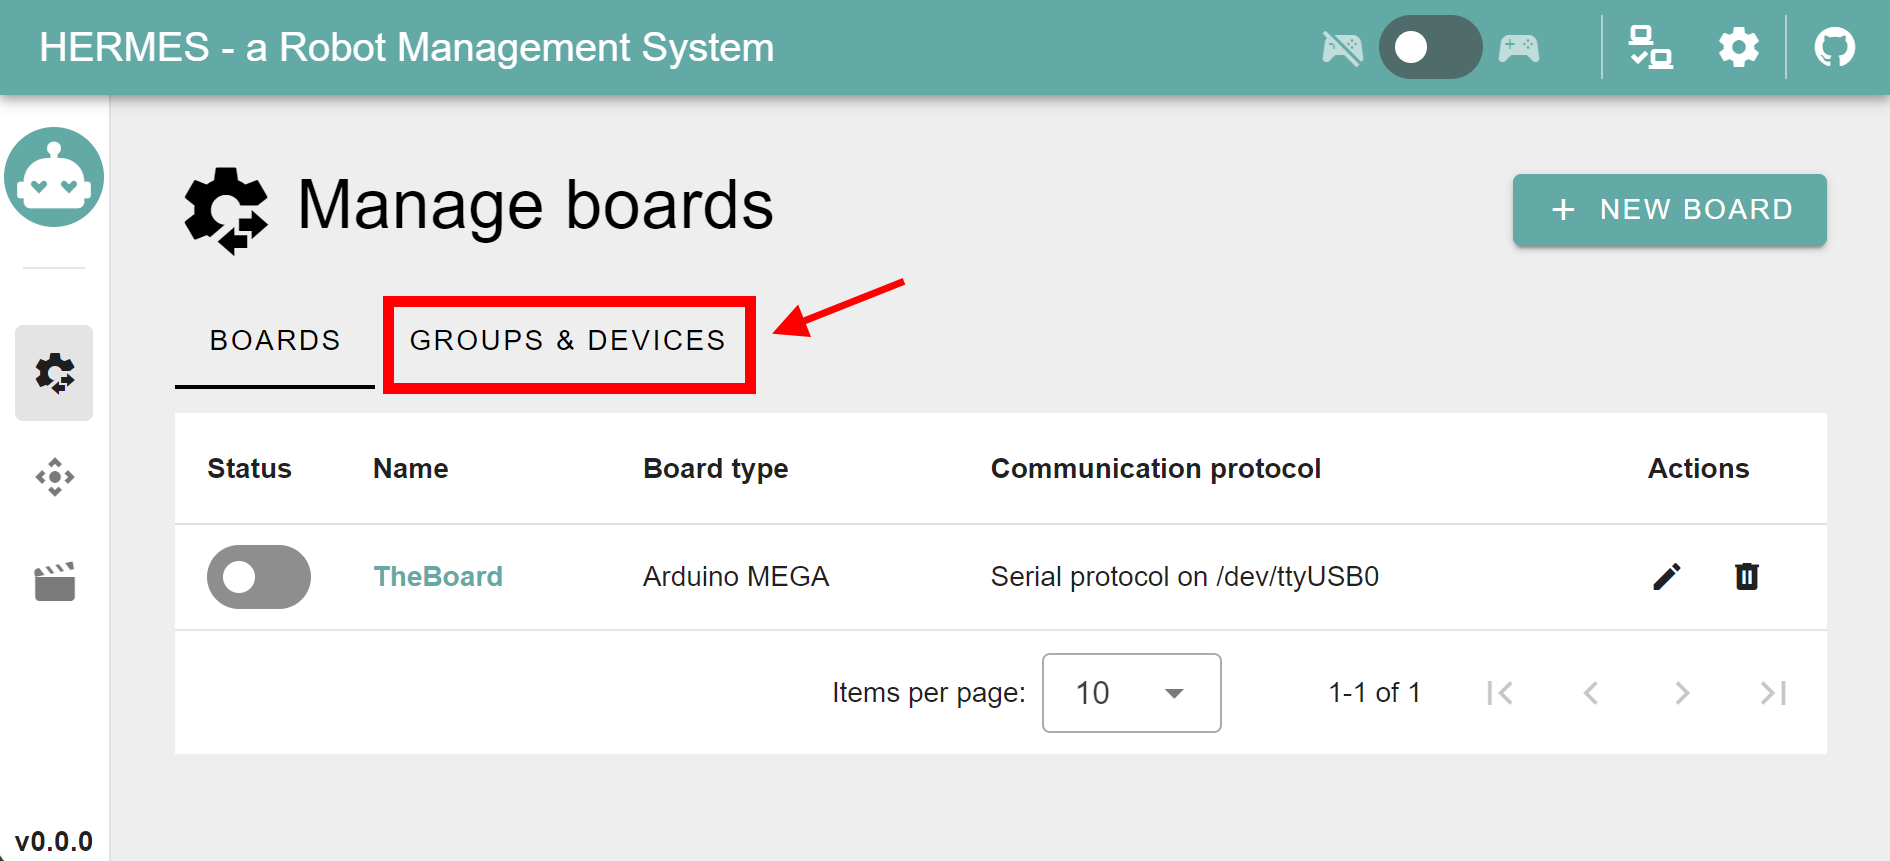
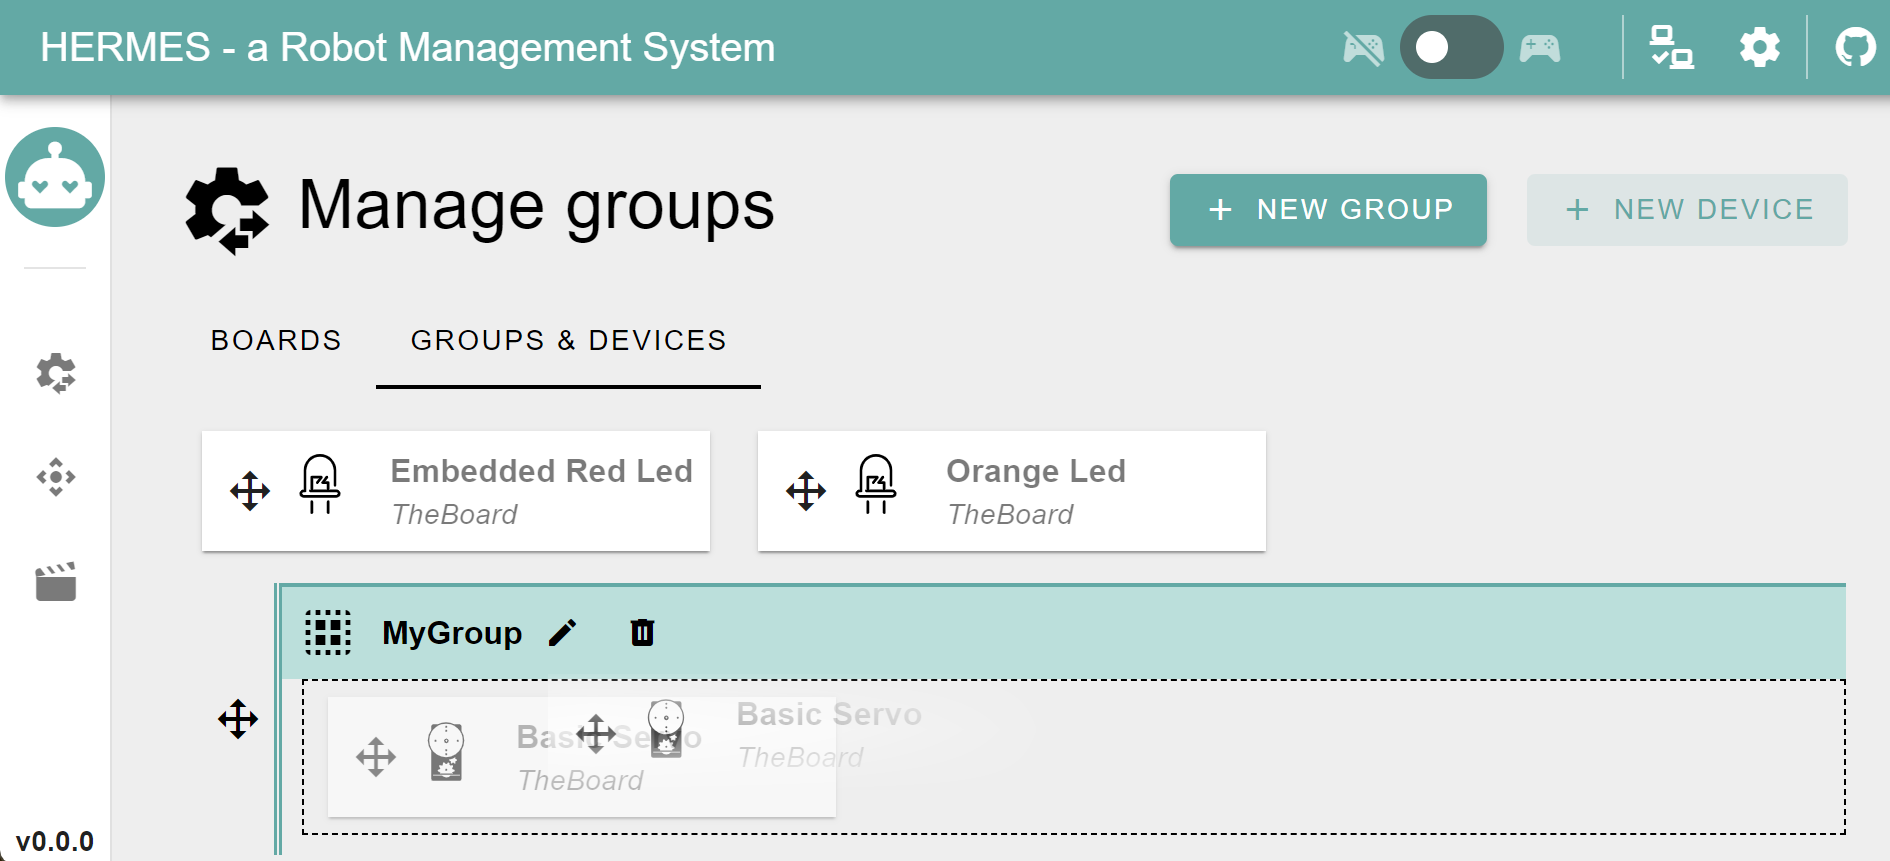
Open the Groups configuration tab from the Configuration Panel.
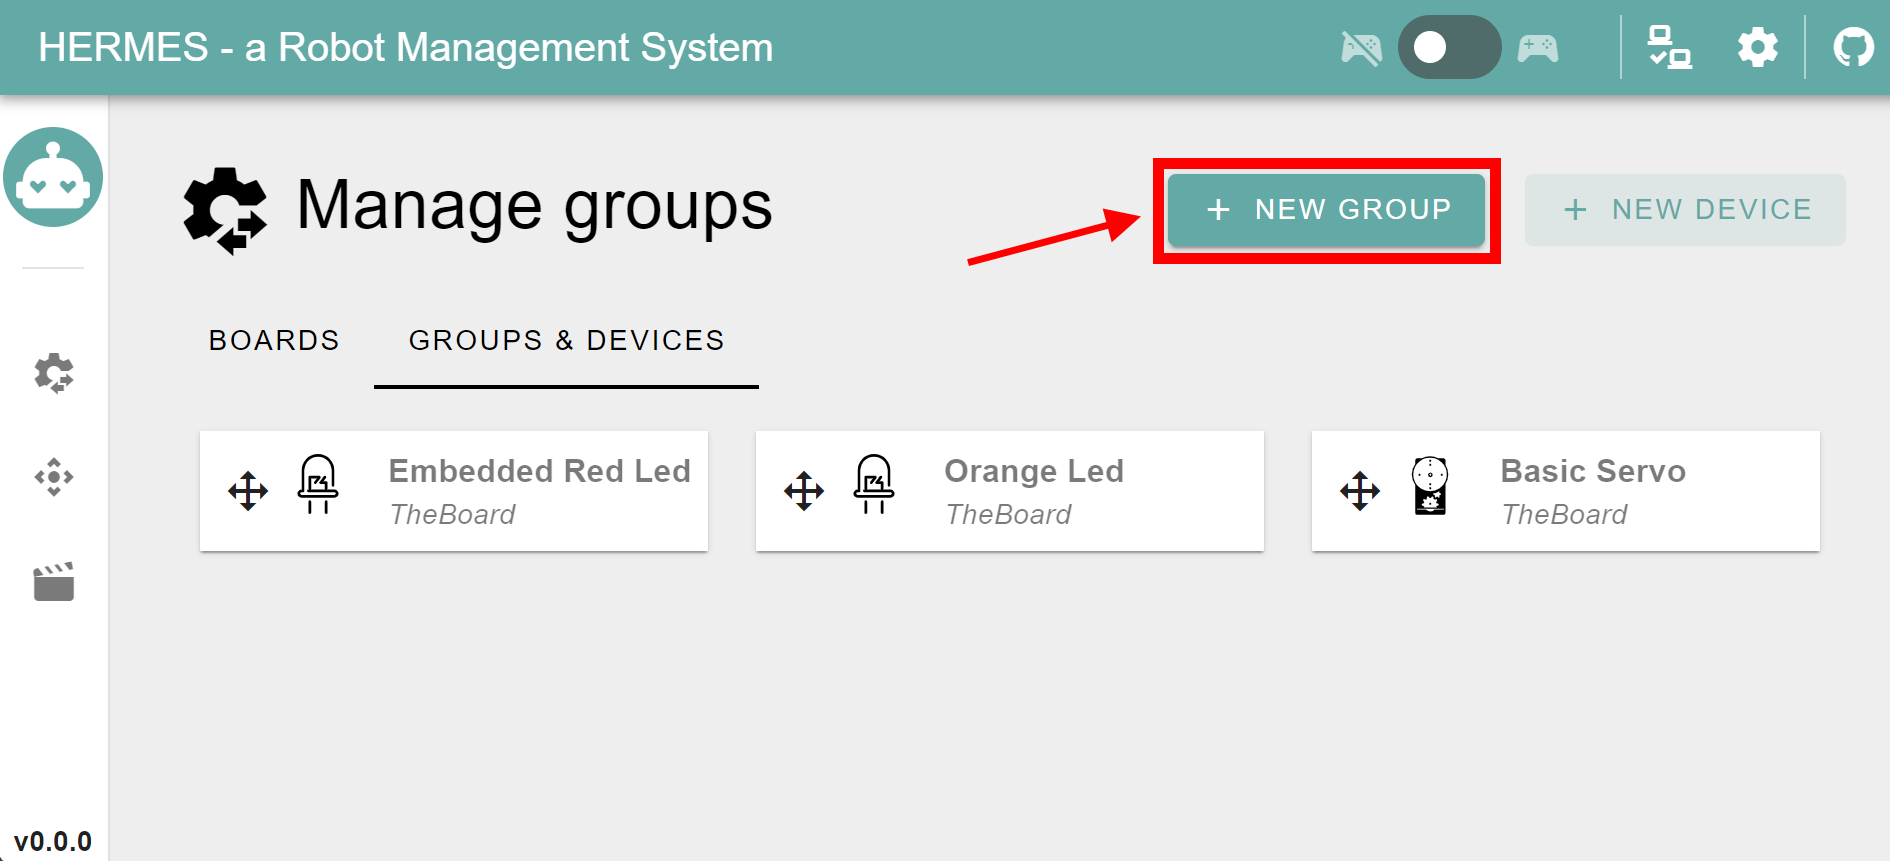
Click on the New Group button.
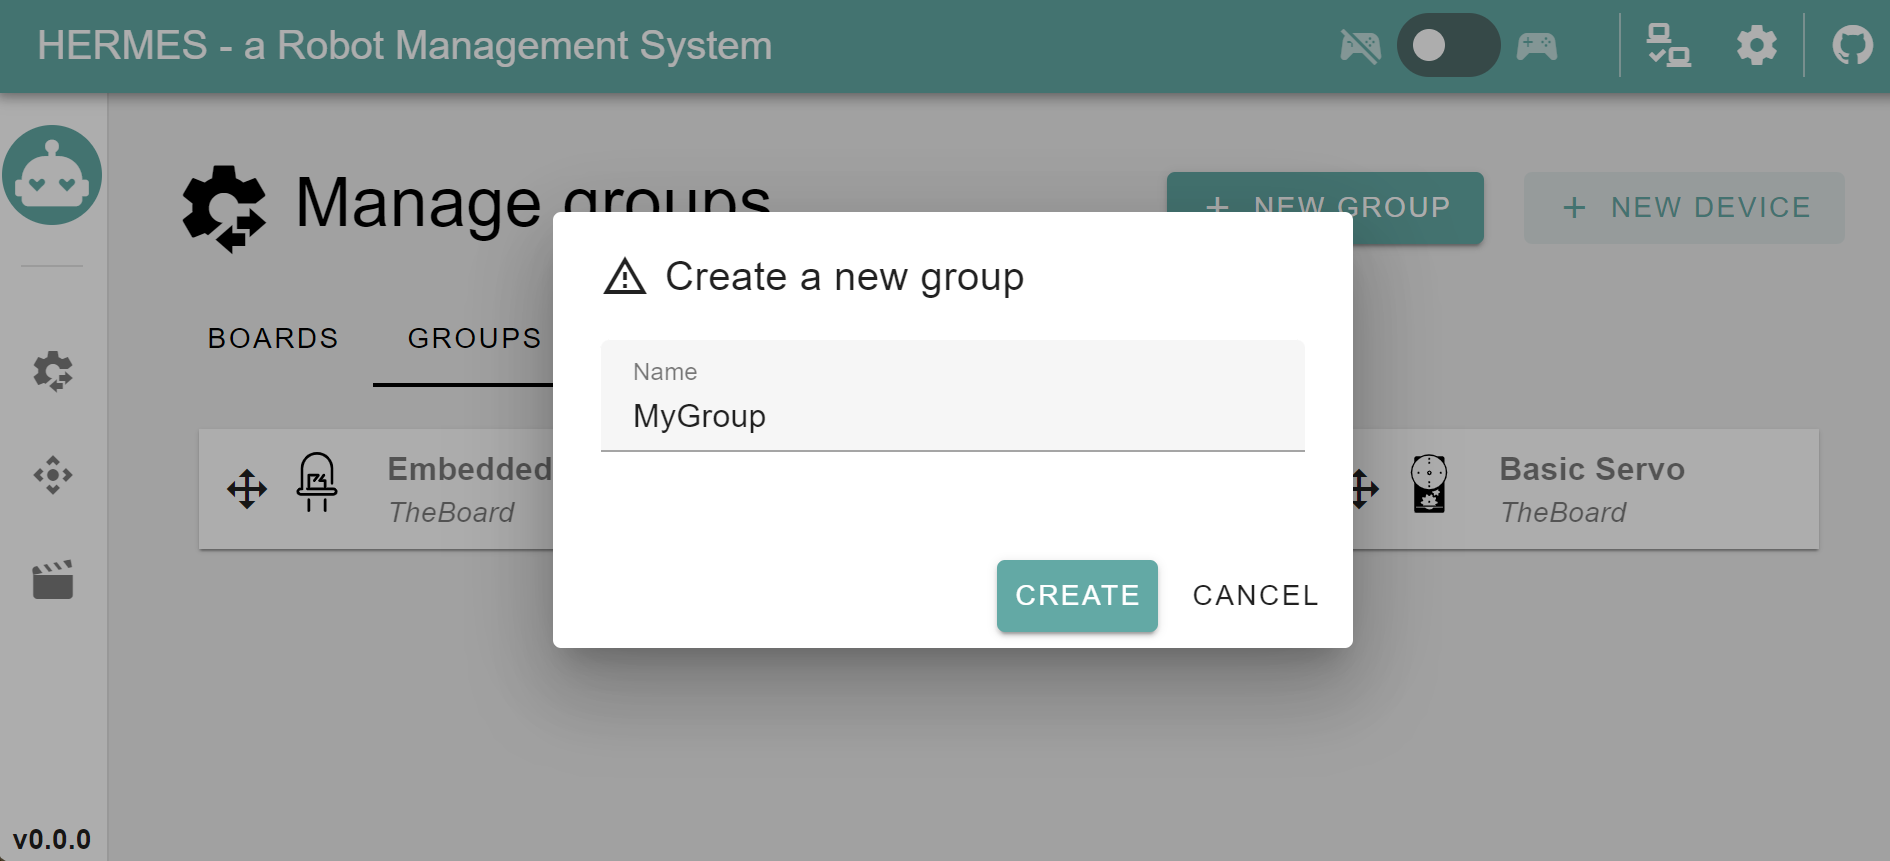
Add a group name.
Drag groups or devices into other groups. Don't hesitate to nest as needed.
TIP
Groups are specially useful when your robot gets complex.
For example, the InMoov robot may have 2 Arduino MEGAs, one Arduino Nano and countless servos and sensors. It is useful to build a structural representation of your robot. 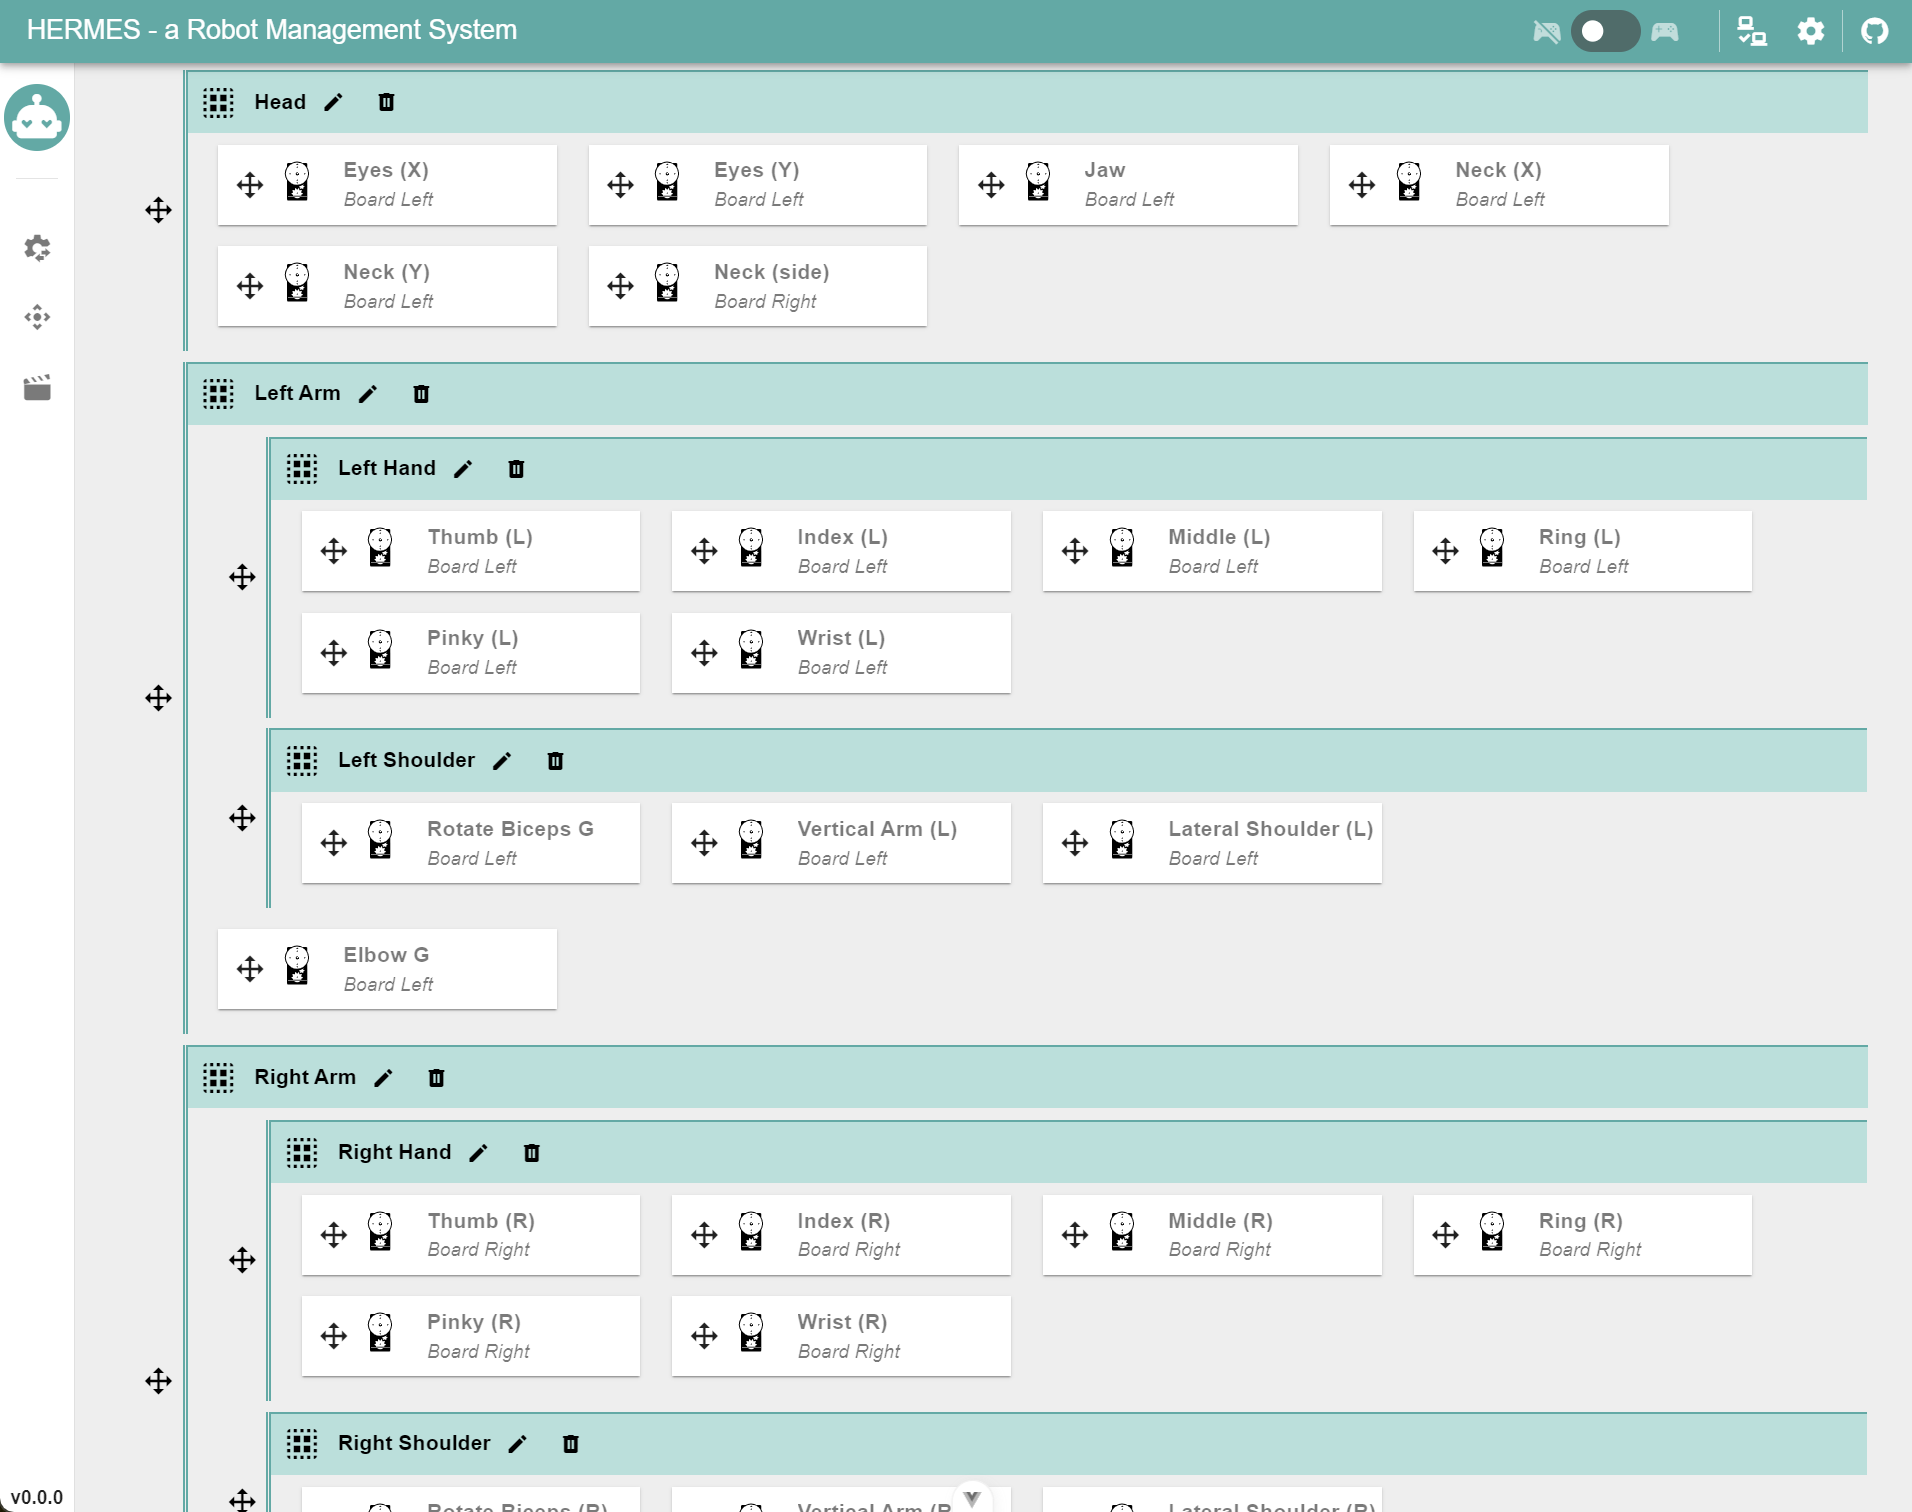
What's next?
Your robot configuration is now complete. It is time to play with it. Discover more about how to control your robot.